
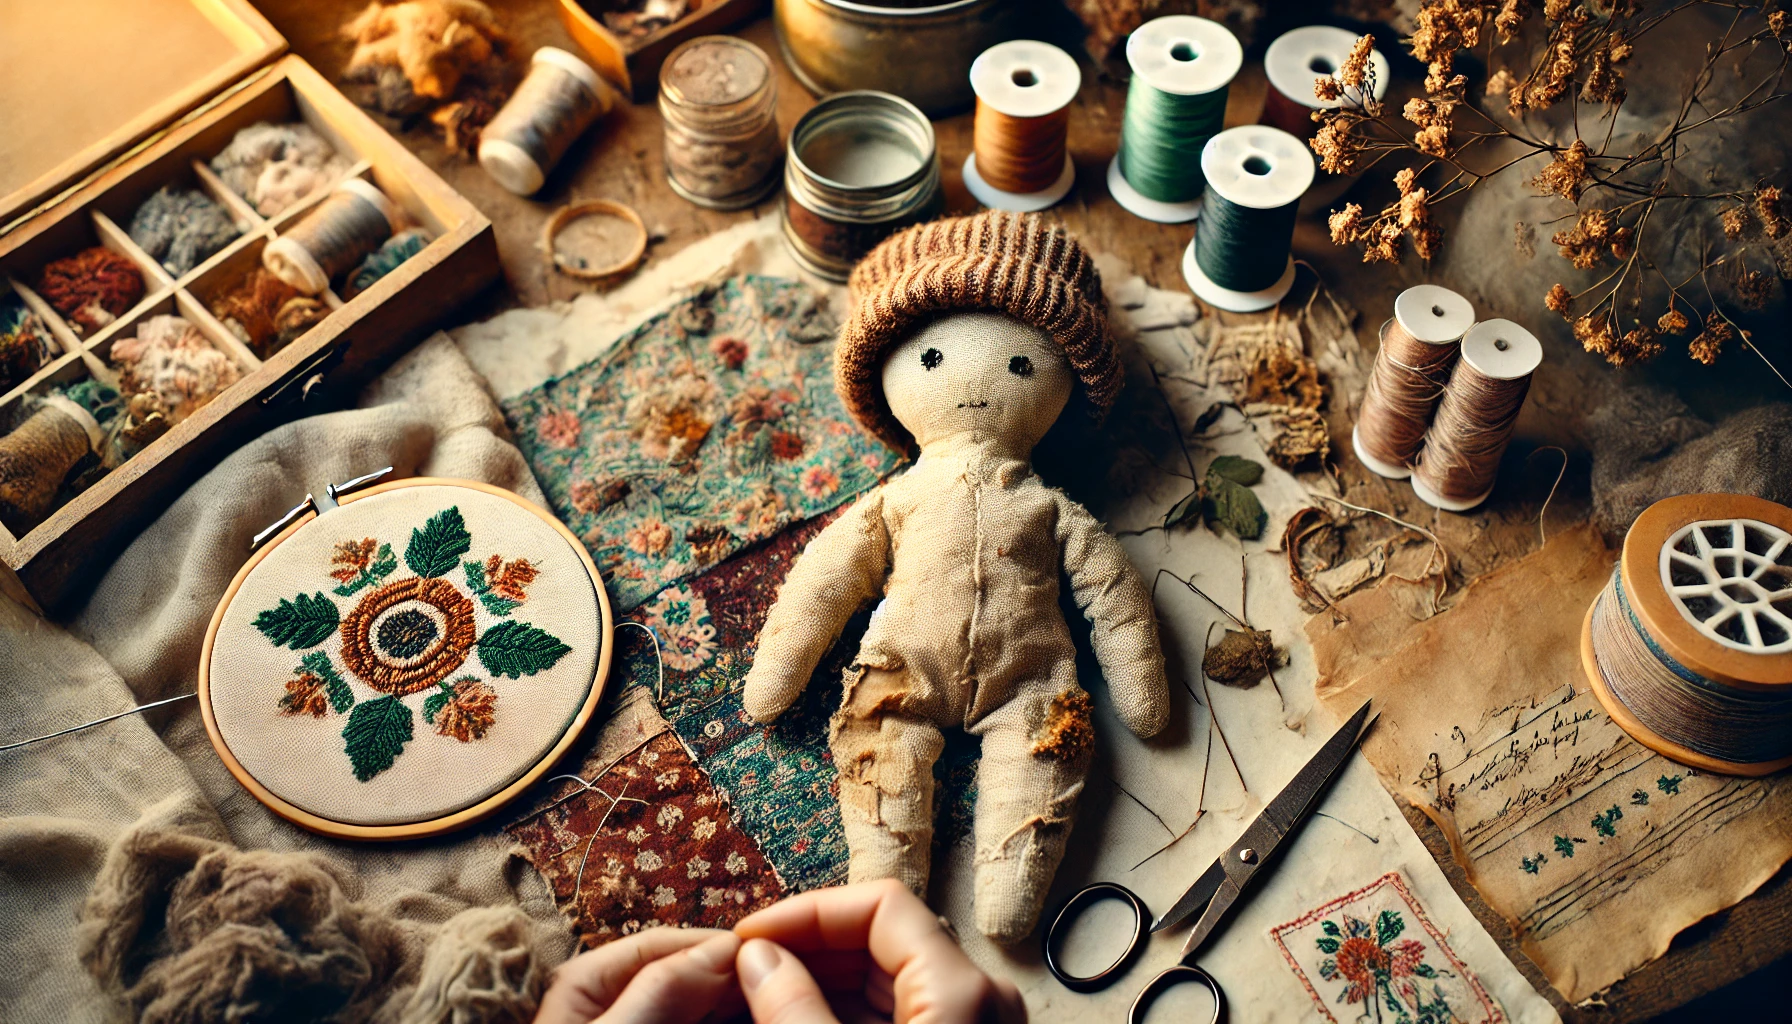
Fabric dolls hold sentimental value, often passed down through generations or cherished as childhood keepsakes. Over time, these dolls can show signs of wear and tear, loose seams, faded fabric, or missing parts. Rather than discarding them, you can restore and repair old fabric dolls, preserving their beauty and history.
In this guide, we’ll cover how to repair fabric tears, restuff sagging dolls, clean delicate fabrics, and restore facial features and hair, bringing your old fabric doll back to life.
Why Restore an Old Fabric Doll?
Restoring a fabric doll allows you to:
- Preserve Sentimental Value – Heirloom dolls often hold deep emotional meaning.
- Extend the Doll’s Life – Proper repairs can make a doll last for many more years.
- Improve Aesthetic Appeal – Removing stains, re-stuffing, and repairing seams can restore the doll’s original charm.
- Maintain Historical or Collector’s Value – Some vintage fabric dolls are valuable when properly maintained.
Assessing the Condition of the Doll
Before starting any repairs, carefully examine the doll to determine what needs to be fixed.
Common Issues in Old Fabric Dolls
| Issue | Signs |
|---|---|
| Torn or Loose Seams | Visible gaps in stitching, stuffing coming out |
| Faded or Stained Fabric | Discoloration, dirt buildup, water damage |
| Sagging or Lumpy Stuffing | Flat areas, uneven filling, lack of shape |
| Damaged Facial Features | Faded paint, missing embroidered eyes or mouth |
| Loose or Missing Hair | Yarn or fabric hair falling out or thinning |
| Detached or Worn-Out Clothing | Frayed edges, missing buttons or embellishments |
Once you’ve identified the problems, you can move on to repairs.
Step-by-Step Guide to Restoring an Old Fabric Doll
Step 1: Cleaning the Doll Without Causing Damage
Cleaning an old fabric doll requires gentle handling to prevent further deterioration.
Handwashing Delicate Dolls
- Use a Mild Detergent – Mix a few drops of baby shampoo or mild detergent in lukewarm water.
- Spot Clean First – Use a soft cloth or cotton swab to dab at stains.
- Handwash Gently – Submerge only the fabric parts in soapy water, avoiding painted or embroidered faces.
- Rinse with Cold Water – Avoid soaking to prevent fabric distortion.
- Air Dry – Lay the doll flat on a towel and reshape it while drying.
Dry Cleaning for Fragile or Antique Dolls
If the fabric is too delicate for washing:
- Use a soft brush to remove dust.
- Dab stains with a mixture of baking soda and water, then wipe gently.
- Let it air out in a dry, shaded area to remove odors.
Step 2: Repairing Fabric Tears and Loose Seams
Small holes and open seams can be hand-sewn or reinforced to prevent further damage.
How to Fix Open Seams
- Use a Backstitch for Strength – A tight backstitch holds seams together firmly.
- Match the Thread Color – Use thread that blends with the original fabric.
- Reinforce the Repair – Double-stitch stress points like underarms and neck seams.
Patching Larger Tears
- Cut a Small Patch from Matching Fabric – If possible, use material from hidden parts of the doll.
- Sew the Patch Using an Invisible Ladder Stitch – Ensures a clean, seamless look.
- Apply a Thin Layer of Fabric Glue (Optional) – For extra reinforcement.
Step 3: Restuffing a Sagging or Flattened Doll
Over time, stuffing can become lumpy, uneven, or compressed.
Steps to Restuff a Fabric Doll
- Open a Small Section of the Seam – Choose a discreet area like the back or underarm.
- Remove Old, Clumped Stuffing – If it’s dirty or hardened, replace it entirely.
- Use Soft, Evenly Distributed Stuffing – Polyester fiberfill or wool roving work best.
- Massage the Doll into Shape – Avoid overstuffing, which can strain seams.
- Sew the Opening Closed – Use a ladder stitch for a hidden seam.
Step 4: Restoring the Doll’s Facial Features
Facial features can fade or wear off with age. Depending on the doll’s original design, you can either re-embroider, repaint, or use fabric markers.
Re-Embroidering Facial Features
- Sketch the Face First – Use a fabric pencil to outline the eyes and mouth.
- Use a Satin Stitch for Eyes – Creates a smooth, solid look.
- Use a Backstitch for the Mouth and Eyebrows – Ensures fine detail.
Repainting or Using Fabric Markers
- Choose Non-Toxic Fabric Paint or Markers – Safe for long-term use.
- Apply Thin Layers – Multiple light layers last longer than one thick coat.
- Seal with a Fabric Fixative (Optional) – Protects against fading.
Step 5: Repairing or Replacing Doll Hair
For Yarn Hair
- If hair is coming loose, re-sew strands in rows using strong thread.
- To replace, cut new yarn pieces and secure them by knotting and stitching into the scalp.
For Fabric Hair
- If hair is fraying, apply a small amount of fabric glue to prevent further unraveling.
- Replace entirely by sewing new fabric hair layers over the old ones.
Step 6: Fixing or Replacing Doll Clothing
Old doll clothing may have tears, missing buttons, or frayed hems.
How to Repair Existing Doll Clothes
- Reinforce seams with small stitches to prevent unraveling.
- Replace missing buttons with securely sewn alternatives.
- Use fabric glue or hem tape for delicate lace or small repairs.
Making New Clothes for a Refreshed Look
- Sew a simple dress from vintage-style cotton or linen.
- Use Velcro or elastic closures instead of small buttons for safer play.
- Add lace trims or embroidery to match the doll’s original design.
Preserving and Storing Restored Dolls
After restoring a fabric doll, proper storage and care can keep it in excellent condition for years.
- Store in a Cool, Dry Place – Prevents mold or fading.
- Wrap in Acid-Free Tissue Paper – Ideal for vintage or heirloom dolls.
- Avoid Direct Sunlight – UV rays can fade fabric and painted features.
- Spot Clean When Necessary – Gently remove stains with mild soap.
- Check for Loose Seams Periodically – Small repairs prevent bigger issues.
Common Mistakes to Avoid
✖ Using Harsh Cleaning Agents – Can damage delicate fabric.
✖ Overstuffing the Doll – Can distort shape and strain seams.
✖ Skipping the Sketching Step for Faces – Ensures even, symmetrical features.
✖ Using Glue Instead of Sewing for Hair and Clothes – Always stitch where possible.
✖ Ignoring Small Repairs Until It’s Too Late – Fixing early prevents further damage.
Conclusion: Bring Old Dolls Back to Life with Careful Restoration
Restoring an old fabric doll is a rewarding and meaningful process. With gentle cleaning, secure stitching, and attention to detail, you can preserve its charm and history while ensuring it remains strong and beautiful for years to come.
Whether you’re repairing a childhood keepsake, restoring a family heirloom, or reviving a vintage doll, these techniques will help you bring new life to old treasures. So grab your sewing kit and start restoring your beloved fabric doll today! 😊