
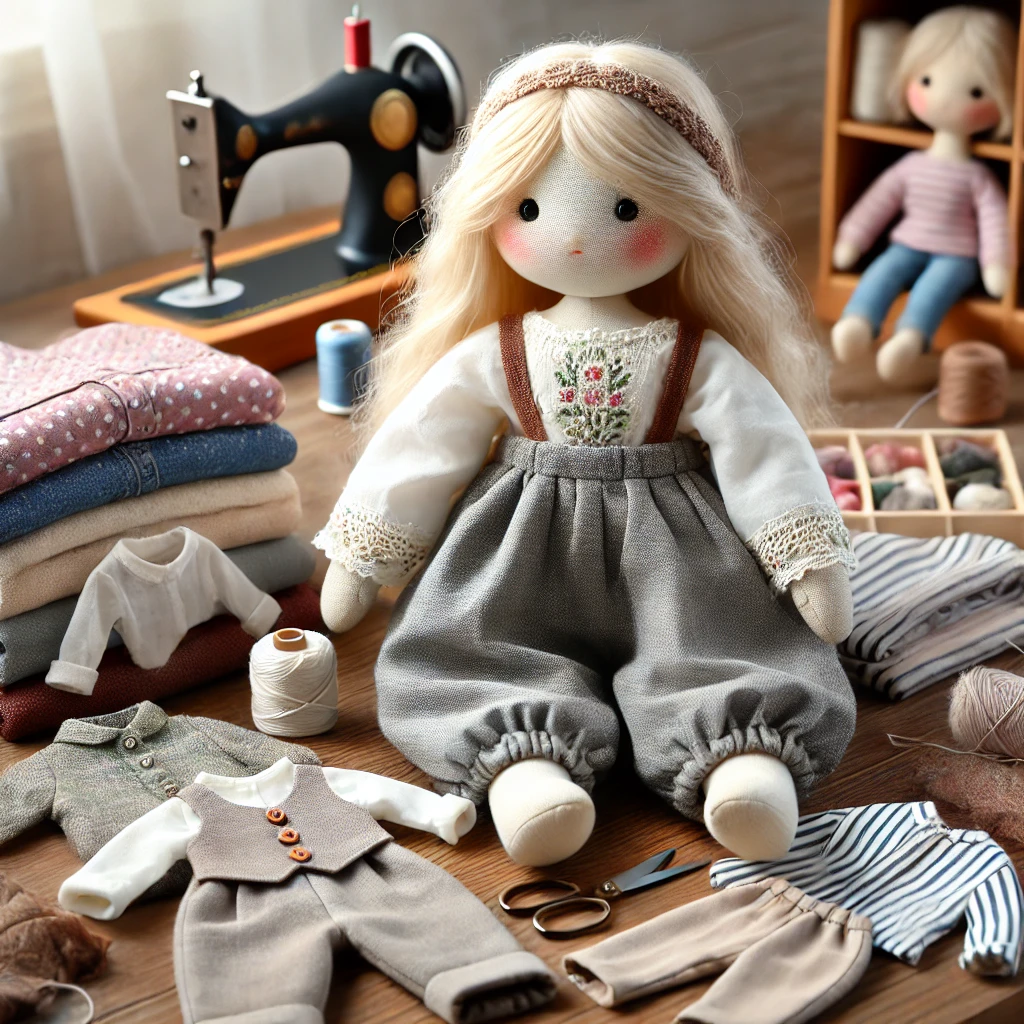
Creating fabric dolls with interchangeable clothes is a fun and rewarding craft project. Whether you’re making them for children, as a gift, or for a small business, these dolls provide hours of entertainment and customization. This guide will walk you through the process of making a fabric doll, designing interchangeable clothes, and adding personal touches to make them unique.
Materials Needed
Before starting, gather the necessary materials to ensure a smooth crafting process:
- Fabric for the doll (cotton, muslin, or felt)
- Fabric for clothing (various patterns and textures)
- Needle and thread (or a sewing machine for faster results)
- Stuffing material (polyester fiberfill or cotton)
- Scissors (fabric scissors for precision)
- Fabric markers or embroidery thread (for facial features)
- Velcro, snaps, or buttons (for clothing attachment)
- Sewing pins and chalk (for marking patterns)
Designing the Fabric Doll
The first step is designing your fabric doll. Consider the size, shape, and features you want. A simple humanoid shape with arms, legs, and a rounded head is a great starting point.
- Create a Pattern – Draw a basic doll shape on paper. Ensure the arms and legs are proportional to the body.
- Cut the Fabric – Fold your fabric in half and pin the pattern to it. Cut out two identical pieces for the front and back of the doll.
- Sew the Doll Together – With the right sides facing inward, sew around the edges, leaving a small opening at the top or side for stuffing.
- Turn and Stuff – Flip the doll right side out and fill it with stuffing. Make sure it is firm but soft.
- Close the Opening – Hand-sew the remaining gap using an invisible stitch for a seamless look.
Adding Facial Features and Hair
Once your doll is stuffed and sewn, add personality with facial features and hair.
- Facial Features: Use embroidery thread to stitch eyes, a nose, and a mouth. Alternatively, fabric markers work well for a simple look.
- Hair Options: Use yarn, felt, or fabric strips for hair. Sew or glue it onto the head in a style of your choice.
Creating Interchangeable Clothes
The key feature of your doll is its ability to change outfits. Designing interchangeable clothes ensures variety and fun.
Basic Clothing Patterns
- Shirts and Dresses – Create a basic T-shirt or dress pattern that fits your doll. Ensure it has a loose fit or an opening at the back to make dressing easier.
- Pants and Skirts – Design simple elastic-waist pants or skirts for easy wear.
- Jackets and Accessories – Consider adding small coats, hats, and scarves for extra customization.
Fastening Clothes Securely
To make the clothes easy to swap, use simple fasteners:
- Velcro Strips – Attach small pieces of Velcro to the back of shirts and dresses for easy opening and closing.
- Snaps or Buttons – Sew small snaps or buttons for a more polished look.
- Elastic Bands – Use elastic for waistbands to ensure a snug yet flexible fit.
Personalizing Your Doll
A fabric doll becomes more special with personal touches.
- Different Skin Tones – Use various fabric shades to create diverse dolls.
- Unique Outfits – Mix and match fabrics for a creative wardrobe.
- Accessories – Add miniature scarves, shoes, or handbags for extra fun.
Maintaining and Cleaning Fabric Dolls
Fabric dolls and their clothes need occasional cleaning to keep them fresh.
- Hand Wash Only – Use mild soap and water to clean both the doll and its outfits.
- Air Dry – Let everything dry naturally to avoid shrinkage.
- Storage – Keep clothes organized in a small box or pouch to prevent loss.
Conclusion
Making fabric dolls with interchangeable clothes is a fantastic craft project that combines creativity and practicality. Whether for play, gifts, or even selling at craft fairs, these dolls offer endless possibilities for customization. With a bit of practice, you can create a collection of adorable, one-of-a-kind dolls that bring joy to children and collectors alike.